Posted by Spycor Building on Apr 25th 2025
Water intrusion can compromise your home's structural integrity and lead to costly repairs. Learning how to waterproof your foundation from the outside is essential to prevent basement leaks and maintain a dry, healthy living space. Ignoring moisture issues can result in mold growth, foundation cracks, and long-term structural damage that reduces property value and increases maintenance costs. By taking action early, you can safeguard your home from future water-related problems.
Why Exterior Foundation Waterproofing Matters
Exterior foundation waterproofing means applying protective materials and drainage solutions on the outside of your foundation to keep water out before it can enter. This proactive method addresses issues at the source, offering stronger, longer-lasting protection than interior solutions alone. It not only helps divert groundwater away but also minimizes hydrostatic pressure against the walls, preventing seepage and deterioration. Especially in areas with high rainfall or poor soil drainage, exterior waterproofing is a critical investment in your home’s long-term stability.
Step-by-Step Exterior Waterproofing Process
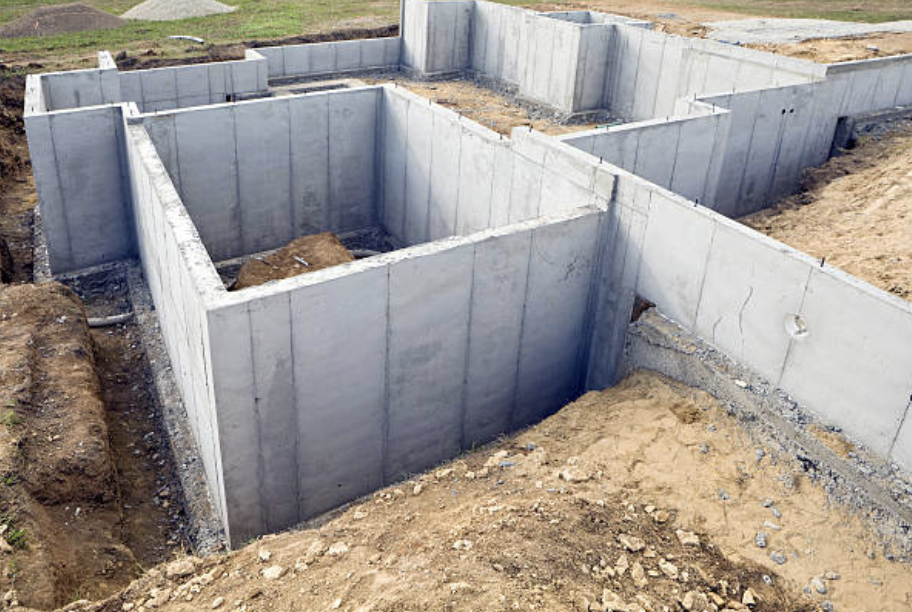
1. Excavation Around the Foundation

Begin by digging around the perimeter of your home to expose the foundation walls down to the footing. This step allows for thorough inspection and preparation of the foundation surface. It’s important to dig carefully to avoid damaging existing utility lines or landscaping. Once the walls are fully exposed, you can assess any visible cracks, deteriorated mortar, or weak spots that need repair. Proper excavation also ensures enough working space to apply waterproofing materials and install drainage systems effectively.
2. Cleaning and Inspecting the Foundation Walls
Clean the exposed walls to remove dirt and debris. Inspect for cracks, deteriorated mortar joints, or other damage that could allow water penetration. A clean surface is essential to ensure proper adhesion of waterproofing materials and to get a clear view of any underlying issues. Use a stiff brush or pressure washer for thorough cleaning, and allow the wall to dry completely before proceeding. Pay special attention to corners, seams, and previous repair areas, as these are common points of failure. Early identification and repair of these vulnerabilities will enhance the effectiveness of your waterproofing system.
3. Repairing Damaged Areas
Poured Concrete Foundations: Seal cracks and repair honeycombing to restore structural integrity. Use hydraulic cement or epoxy injections for cracks, depending on their size and location. Addressing these issues before waterproofing ensures a solid, watertight base and prevents future leaks caused by shifting or expanding cracks.
Cinderblock or Fieldstone Foundations: Repoint mortar joints and patch holes to create a smooth surface for waterproofing materials. Use high-quality mortar or masonry patching compounds to fill gaps and stabilize loose areas. This step is crucial for older homes, where mortar degradation can lead to water infiltration and foundation weakening over time. A uniform surface allows for better adhesion and long-lasting performance of your chosen waterproofing system.
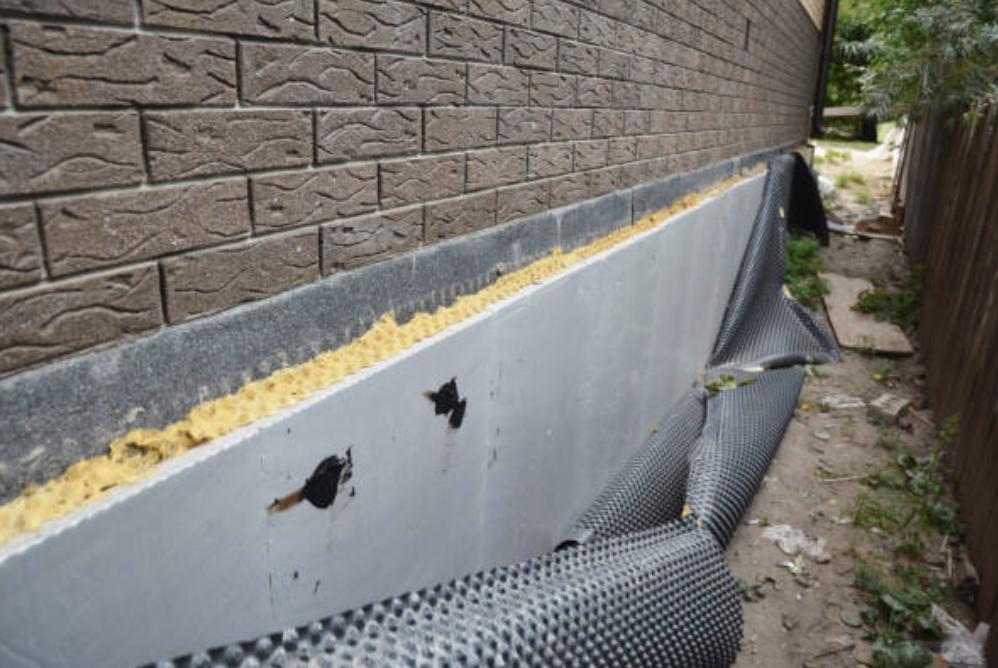
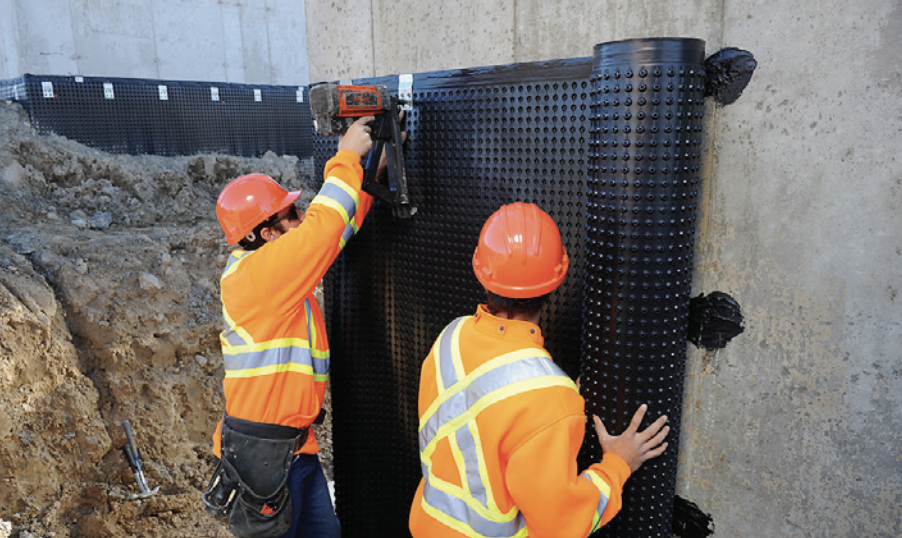
4. Applying Waterproofing Membranes
Choose a high-quality waterproofing membrane to apply to the prepared foundation walls. This layer acts as the primary defense against water infiltration and is most effective when applied to a clean, repaired surface. The type of membrane you choose will depend on your home’s specific needs and environmental conditions. Options include:
- Liquid-Applied Coatings: Provide a seamless barrier against moisture. These are easy to apply with a brush, roller, or sprayer and can conform to irregular surfaces or detailed areas, ensuring full coverage. Once cured, they form a flexible, durable shield that resists cracking and peeling over time.
- Sheet Membranes: Offer robust protection and are ideal for areas with high water tables. Typically made of rubberized asphalt or other waterproof materials, these pre-formed sheets are applied in overlapping sections, creating a strong physical barrier. They are especially effective for foundations that require extra durability under heavy hydrostatic pressure.
- Dimple Boards: Facilitate drainage and protect the waterproofing layer from damage during backfilling. These rigid plastic panels create an air gap between the soil and the foundation wall, allowing water to flow down to the drainage system while shielding the membrane from punctures and abrasion.
Applying these layers carefully and thoroughly ensures your foundation is well-protected for years to come.
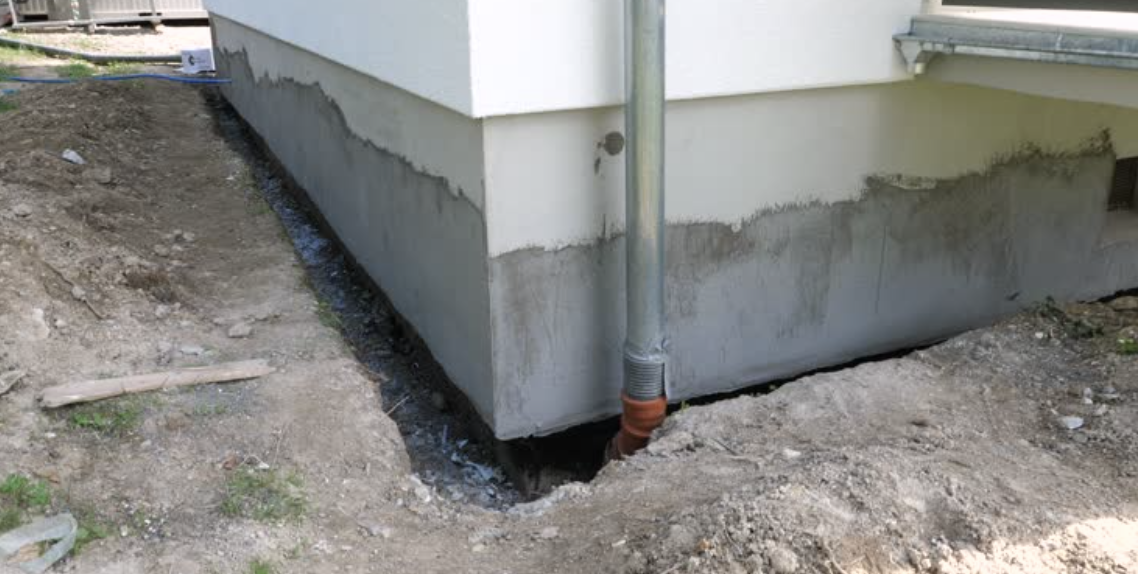
5. Installing Drainage Systems
Implement an exterior French drain system by placing a perforated pipe at the base of the foundation, surrounded by gravel and wrapped in filter fabric. This system directs water away from the foundation, preventing accumulation that could lead to hydrostatic pressure and water seepage. The gravel provides space for water to flow easily toward the pipe, while the filter fabric prevents soil and debris from clogging the pipe. It’s essential to ensure proper slope and positioning of the pipe to guide water efficiently to the desired drainage area, such as a storm drain or sump pump system. A well-installed French drain system helps to maintain the integrity of your waterproofing and reduces the risk of future foundation problems caused by water buildup.
6. Backfill and Grade the Soil
Backfill the trench with crushed stone or suitable soil, ensuring the material is compacted properly to prevent settling over time. Crushed stone is often preferred as it promotes proper drainage and helps direct water away from the foundation. Once the trench is filled, it's important to grade the soil so that the ground slopes away from the house. This slope should be at least a 2% grade, or roughly 1 inch of drop per 4 feet of distance from the foundation. Proper grading ensures that rainwater or groundwater will flow away from the house, reducing the risk of pooling near the foundation and preventing potential water infiltration. This step is crucial for maintaining the effectiveness of your waterproofing system and protecting the structural integrity of your home.
7. Extend Downspouts and Add Window Wells
Extend downspouts at least 4–6 feet from the home to ensure that water is directed well away from the foundation. This prevents water from collecting near the base of the house, which could otherwise seep into the foundation or basement. Consider adding downspout extensions or splash blocks to further channel water away from the house and minimize erosion.
For homes with basement windows, use window wells with proper drainage to keep water from pooling near the windows. The window wells should be securely anchored to the foundation and equipped with a drainage system, such as perforated pipes or gravel, to direct water away from the area. Well-maintained window wells protect the waterproofing around basement windows and prevent leaks or water damage in the basement.
Step 8: Landscaping and Downspout Extensions for Enhanced Water Management
The final step in ensuring your home's foundation is fully waterproofed involves strategic landscaping and downspout management. Proper landscaping not only enhances your yard's aesthetic but also plays a crucial role in water runoff and foundation protection.
Grading is one of the most essential landscaping techniques to prevent water accumulation around your foundation. By grading the soil around your home, you ensure that it slopes away from the foundation. This prevents water from pooling around the base of your house, which can lead to foundation cracks and leaks.
Waterproofing your foundation from the outside is a multi-step process that pays off in long-term protection, increased home value, and peace of mind. From excavation and sealing to drainage and landscaping, each part plays a vital role in keeping your basement dry and your structure solid. Investing in exterior waterproofing not only prevents costly future repairs but also creates a healthier living environment by reducing the risk of mold, mildew, and foundation damage. Whether you're tackling a new build or retrofitting an older home, following the proper steps ensures lasting results and added durability.
CLICK HERE to check the best exterior waterproofing products based on your project needs — including membranes, drainage boards, sealants, and more. Choose trusted materials to ensure your system performs effectively for years to come.